
Publishing your first Android app on Google Play Store can be confusing. You may have a fully working app but still face problems with developer account verification, app testing, privacy requirements, or Google Play approval. One missing detail can delay your app’s launch or cause Google to reject it. To publish an app on Google Play Store in 2026, you need to create a Google Play Console developer account, pay the $25 registration fee, prepare a signed Android App Bundle (AAB), complete your store listing, meet Google’s testing requirements, and submit your app for review.
Once Google approves your app and it is published, users in your selected countries can download it from the Play Store. We explain the complete process in seven steps, including the latest requirements, common publishing errors, and what to do after your app goes live.
What Do You Need to Publish an App on Google Play Store?
Before you start publishing, make sure your Android app and the required information are ready. Google checks your developer identity, app details, technical setup, and policy compliance before allowing your app to reach users.
Preparing these details early can help you avoid common problems during submission.
| Requirement | What You Need |
| Google Account | An active Google account |
| Developer Account | A verified Google Play Console account |
| Registration Fee | $25 one-time payment |
| Android App | A complete, working Android application |
| App File | Signed Android App Bundle (.aab) |
| Store Listing | App name, description, category, and graphics |
| Privacy Policy | Publicly accessible privacy policy |
| App Content | Required data safety and content declarations |
| Testing | Closed testing if required for your account |
| Contact Information | Valid developer and support details |
Google requires developers to be at least 18 years old to register for a developer account. The $25 registration fee is a one-time payment, so you do not need to pay it again each time you publish another app using the same account.
Step 1: Create a Google Play Developer Account
Google Play Console is the official platform used to publish and manage Android apps on Google Play Store. You use it to create app listings, upload files, complete testing, submit releases, and check performance. To get started, visit Google Play Console and sign in with your Google account. You will need to register as a developer before you can publish your application.
Choose a Personal or Organization Developer Account
Google Play offers two developer account types. Choosing the correct one matters because the verification process and some publishing requirements are different. A Personal developer account is generally suitable for individual developers who want to publish apps under their own identity. An Organization developer account is intended for registered businesses and other eligible organizations publishing apps under their legal organization information.
| Personal Account | Organization Account |
| Suitable for individual developers | Suitable for registered businesses |
| Uses personal identity information | Uses organization information |
| Requires identity verification | Requires business verification |
| New qualifying accounts require closed testing | Not subject to the same new-personal-account testing rule |
| $25 registration fee | $25 registration fee |
Organizations generally need a D-U-N-S number for verification, subject to Google’s requirements. This number helps identify and verify a registered business. If your app belongs to a company, choose the account type that correctly represents the legal owner of the application.
Register on Google Play Console and Verify Your Identity
Once you have selected your account type, complete the registration and verification process.
- Open Google Play Console.
- Sign in using your Google account.
- Choose your developer account type.
- Review and accept the Developer Distribution Agreement.
- Enter your personal or organization information.
- Pay the $25 registration fee.
- Complete the required identity and contact verification.
Google may request a government-issued identity document, business documents, or other information depending on your account type. New personal account holders may also need to verify access to a physical Android device using the Play Console mobile app.
Step 2: Prepare Your Android App for Upload
After creating your developer account, prepare your app for submission. Google Play requires a properly built and signed application that meets its technical and security requirements. An app that runs successfully during development may still have problems in its final release version. Before uploading, check that the app works correctly and that the required Android settings are configured.
Generate a Signed Android App Bundle (AAB)
An Android App Bundle, also called an AAB, is the file format used to publish new Android apps on Google Play. Unlike an APK, which is an Android installation package, an AAB allows Google Play to generate optimized installation files for different devices.
If you developed your app using Android Studio, follow these steps to generate the release file.
- Open your Android project in Android Studio.
- Select Build > Generate Signed Bundle / APK.
- Choose Android App Bundle.
- Select an existing keystore or create a new one.
- Enter the required signing information.
- Select the release build variant.
- Generate your signed AAB file.
The exact menu names may differ depending on your Android Studio version. If your app was developed using Flutter or another supported development framework, use that framework’s release build process to generate the AAB. Keep your upload key and keystore details secure. You may need them when submitting future updates.
Set Up Your Package Name, App Version, and Play App Signing
Every Android application needs a unique package name, also called an application ID. It identifies the app within Android and Google Play. For example, an application developed by Nexaryl could use a package name such as nexaryl.exampleapp, provided the identifier is appropriate.
You must also configure the app’s version information and signing settings.
- Package name: A unique identifier for your application.
- Version name: The version displayed to users, such as 1.0.
- Version code: An internal number that increases when you release an update.
- Upload key: The signing key used to upload your release bundle.
- Play App Signing: Google’s service for securely managing the signing key used to distribute your app.
Choose your package name carefully. After publication, you cannot simply change the application ID and keep the same app identity.
Check the Android API Level and App Compatibility
Google Play requires new apps to target a recent Android API level. This helps apps work with current Android security and system behavior. As of October 2026, standard new Android apps and updates for phones and tablets must target Android 16 (API level 36) or higher. This requirement took effect on August 31, 2026, although certain device categories have different requirements and eligible developers may have access to extensions.
Before uploading your app, check these important details.
- Your app meets the applicable target API requirement.
- The app installs and opens correctly.
- Login and other important features work.
- The app supports its intended Android devices.
- It does not crash during normal use.
- It requests only necessary device permissions.
- It meets applicable 16 KB memory page compatibility requirements.
Test your app on a real Android device whenever possible. Also check the release version because some problems appear only after the app has been built for distribution.
Step 3: Create Your App in Google Play Console
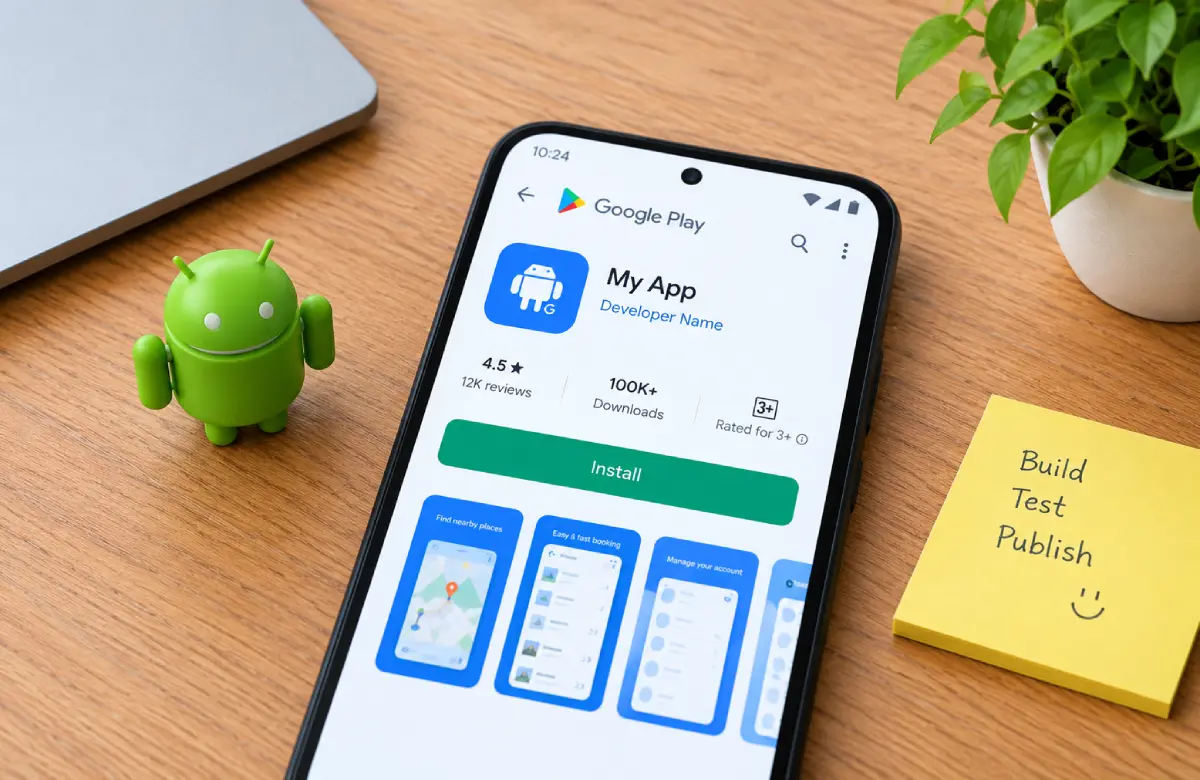
Once your Android App Bundle is ready, the next step is to create an app entry in Google Play Console. This creates a space where you can manage your app’s details, store listing, testing, and release process. Creating the app entry does not mean the application is already published.
Follow these steps to create your app.
- Sign in to your Google Play Console dashboard.
- Open All apps.
- Click Create app.
- Enter your application name.
- Choose the default language.
- Select whether it is an app or game.
- Choose whether the app will be free or paid.
- Complete the required initial declarations.
- Click Create app.
After creating your app, Google Play Console will display the setup tasks that need to be completed before publishing. Choose your free or paid setting carefully. Once an app has been offered for free on Google Play, you cannot change that same app to a paid download. You would need to create a new app with a different package name to charge an upfront download price.
Step 4: Complete Your Google Play Store Listing
Your Google Play Store listing is the page people see before downloading your application. It helps users understand what the app does, what features it offers, and whether it meets their needs. A clear and accurate store listing can help users make better download decisions. It also gives Google information about your app’s purpose and category.
Add Your App Name and Descriptions
Open the Main store listing section in Google Play Console and enter your app information.
Google Play sets character limits for the main listing fields.
| Store Listing Field | Maximum Characters |
| App Name | 30 |
| Short Description | 80 |
| Full Description | 4,000 |
Your app name should be clear and easy to remember. The short description should explain the app’s main benefit, while the full description should cover its important features and how users can use them.
For example, if you are publishing an expense tracker, your short description could be:
Track daily expenses, manage budgets, and understand your spending.
The full description could explain how users record expenses, create budgets, view reports, and manage their spending history. Use simple language and include relevant keywords where they fit naturally. Avoid repeating the same keywords or making claims about features your app does not offer.
Upload Your App Icon, Screenshots, and Feature Graphic
Your app’s graphics are an important part of its Play Store listing. They show users what the application looks like and how it works. Google Play has specific requirements for graphic assets.
| Graphic Asset | Specification |
| App Icon | 512 × 512 pixels, 32-bit PNG |
| Feature Graphic | 1024 × 500 pixels |
| Screenshots | At least 2 screenshots for a basic phone listing |
| Promotional Video | Optional YouTube video |
Additional screenshot requirements and recommendations may apply depending on the devices and Google Play surfaces you want to support. Use clear screenshots taken from your actual application. Choose images that show the features users are most likely to care about.
Choose Your App Category, Tags, and Contact Information
Google Play uses app categories and tags to help organize applications. Choose a category that matches your app’s main purpose. For example, an online learning app may fit under Education, while an expense management app may fit under Finance. You can also choose relevant tags that describe the application. Avoid selecting unrelated tags simply because they appear popular. Add your required developer contact information, including a valid support email address.
To improve your store listing, use an accurate app title, a useful description, clear screenshots, and relevant tags. These are basic parts of App Store Optimization (ASO). If your application serves users in multiple countries, you can also prepare translated store listings so people can understand your app in their preferred language.
Step 5: Complete Google Play Policy and App Content Requirements
Before publishing, you must provide accurate information about your app’s content, privacy practices, and features. Google uses these declarations to check whether your application follows its Developer Program Policies. Missing information, inaccurate declarations, or restricted features can lead to rejection. You can complete these requirements through the App content section of Google Play Console.
Add Your Privacy Policy and Complete the Data Safety Form
A privacy policy explains what user information your app collects, how it is used, and whether it is shared with other services. For example, if your app collects names, email addresses, location details, or device information, your privacy policy should explain those practices.
Your privacy policy should be publicly accessible and match the app’s actual behavior. You must also complete the Google Play Data Safety form. This asks about information collected or shared by your app, including data handled by third-party services such as analytics and advertising SDKs.
Important information may include:
- Personal information collected by the app.
- Why is the information collected?
- Whether data is shared with third parties.
- How data is protected.
- Whether users can request deletion of their information.
Set Your App’s Content Rating and Target Audience
Google Play requires apps to have an appropriate content rating. This helps users understand whether an application is suitable for different age groups. Complete the content rating questionnaire in Google Play Console. The rating process uses the International Age Rating Coalition (IARC) system to determine applicable age classifications.
You must also select your app’s target audience.
For example, if your app is designed for adults, choose the age groups that match its actual users. If your app targets children, additional Families policies may apply, including restrictions related to advertising and data collection. Provide accurate answers about your app’s content and intended users. An incorrect rating or audience declaration may lead to a policy issue.
Complete Ads, App Access, and Other Required Declarations
Depending on your app’s features, Google Play may ask you to complete additional declarations. If your app displays advertisements, you must declare that it contains ads. If your application requires users to log in, provide working test credentials and clear instructions so Google reviewers can access restricted features.
Apps using sensitive permissions or offering certain services may need additional declarations. These can include financial services, health features, VPN functionality, or access to sensitive device information. Only request permissions necessary for the app to function.
Step 6: Test Your Android App Before Publishing
Testing allows you to find problems before your application becomes available to the public. Google Play Console provides different testing options, and some developer accounts must complete a closed test before they can apply for production access. The purpose of testing is to check app functionality, identify bugs, and collect useful feedback from real users.
Choose the Right Testing Track and Upload Your App
Google Play provides three main testing tracks.
| Testing Track | Purpose |
| Internal Testing | Test an app with a small group of trusted users |
| Closed Testing | Test with selected users before public release |
| Open Testing | Allow a wider audience to test an app when eligible |
Internal testing supports up to 100 testers and is useful for checking early builds. Closed testing is especially important for new personal developer accounts that must meet Google’s production access requirements.
To start a test, open the Testing section in Play Console and select the track you want to use. Create a release, upload your AAB, add the required testers, and follow the available release instructions.
Complete the 12-Testers and 14-Day Closed Test (If Required)
Google requires developers with personal accounts created after November 13, 2023, to complete a closed test before applying for production access. At least 12 testers must remain opted in continuously for 14 days before the developer can apply.
This requirement does not apply automatically to every Google Play developer account.
To complete the test:
- Open Closed testing in Google Play Console.
- Create a closed testing track.
- Add the email addresses or groups of eligible testers.
- Upload your app and create a testing release.
- Share the testing opt-in link.
- Make sure at least 12 testers remain opted in for 14 continuous days.
- Collect feedback and resolve important issues.
Ask your testers to use the app rather than simply join the test and ignore it. Google evaluates the information you provide about testing and app readiness when you apply for production access. If the number of continuously opted-in testers falls below the required level, you may need additional testing time before meeting the eligibility requirement.
Apply for Production Access
Once you have completed the required closed testing period, you can apply for production access from your Play Console dashboard. Google may ask questions about how you tested the application, what feedback you received, and whether the app is ready for public use.
Answer these questions accurately and describe any important fixes made during testing.
Google reviews the application for production access. Completing the testing period does not automatically guarantee approval. If you are having trouble with developer account setup, testing requirements, or production access, Nexaryl‘s Google Play Console Management service can help you understand and complete the necessary publishing tasks.
Step 7: Submit and Publish Your App on Google Play Store
After finishing your store listing, policy declarations, and required testing, you can prepare your app for public release. Before submitting, make sure the final version works correctly and that there are no unresolved setup errors in Google Play Console.
Set App Pricing and Country Availability
Google Play allows developers to choose the countries and regions where their apps will be available. Open the relevant pricing and country availability settings in Play Console and select your preferred markets.
For example, if your app serves customers in Pakistan, you can make it available there. If the app supports international users, you can choose additional eligible countries. Check that the app’s language, features, and payment options are suitable for the countries you select.
Create a Production Release and Submit It for Review
A production release is the version of your app intended for public download.
To prepare your first production release:
- Open Google Play Console.
- Select the app you want to publish.
- Go to Test and release > Production.
- Select Create new release, when available.
- Upload or select your final Android App Bundle.
- Enter the release name and release notes.
- Review your release information.
- Resolve any errors shown in Play Console.
- Complete the rollout and review submission actions displayed.
The exact options may differ based on your app’s current publishing status. Check the Publishing overview page to make sure your changes have been sent for review. Saving a release draft does not mean the submission process is complete. For a first app release, Google Play does not offer the percentage-based staged rollout feature used for certain updates to existing apps.
Check Your App’s Review Status and Go Live
After you submit your app, Google reviews it for compliance with its technical, privacy, content, and developer policies. You can check your app’s status through Google Play Console. During this process, your app may show different review or publishing statuses. Read any notices carefully, especially if Google requests changes.
If your app is approved and its publishing process is completed, it can become available to users in your selected countries. Once it is published, open the app’s Google Play Store page and check that the name, description, screenshots, and installation option appear correctly.
How Long Does Google Play Take to Approve an App?
Google Play approval time depends on several factors, including developer verification, app content, testing requirements, and the review process. Some reviews are completed within a few hours or days, while others can take longer. Google advises that reviews may take up to seven days or longer in exceptional cases.
The total time needed to launch an app can be longer because account verification and mandatory testing are separate stages.
| Stage | Expected Time |
| Developer Registration | Registration can be completed in one session; verification varies |
| App Preparation | Depends on app readiness |
| Store Listing and Declarations | Depends on the information available |
| Mandatory Closed Testing | At least 14 continuous days for qualifying accounts |
| Production Access Review | Varies |
| Google Play App Review | A few hours to 7 days, or longer in exceptional cases |
These are general expectations, not guaranteed approval times. If your account requires closed testing, make sure you complete it before planning your public launch date. Avoid making unnecessary changes while your app is under review, as new submissions may affect the review process.
Common Google Play Publishing Problems and Solutions
Even after following the publishing steps, you may encounter errors during submission or review. The best way to resolve a problem is to read the exact message in Google Play Console and address its cause.
Here are some common issues developers face.
| Problem | Possible Reason | Solution |
| App Rejected | Policy violation or inaccurate app information | Review the rejection notice, fix the issue, and resubmit |
| AAB Upload Failed | Incorrect signing, version code, or build settings | Check your release configuration and upload key |
| Production Access Denied | Testing or app readiness requirements not satisfied | Review Google’s decision and improve testing |
| App Stuck in Review | Review is ongoing or submission is incomplete | Check Publishing overview and notifications |
| Privacy Policy Rejected | Broken URL or incorrect disclosures | Fix the policy and match it with actual data practices |
| App Not Visible on Play Store | Publishing status, country restrictions, or device compatibility | Check availability and release settings |
If Google rejects your application, check the rejection message and Policy Status section for the reason. For example, if Google cannot review features behind a login screen, provide working test credentials and instructions. If you believe Google has made an incorrect policy decision, use the available appeal process when appropriate. Avoid submitting the same app repeatedly without correcting the reported problem.
What Happens After Your App Is Published?
After your app becomes available on Google Play, you should monitor its performance and respond to user feedback. Google Play Console provides information about downloads, ratings, reviews, crashes, and other performance details.
You can also use Android Vitals to identify stability problems, such as frequent crashes or Application Not Responding (ANR) errors. If users report an issue, investigate it and prepare an update when necessary.
To publish an update, increase the app’s version code, generate a new signed AAB, and submit the updated release through Google Play Console. You should also keep your store listing accurate whenever you add or remove features. Regular maintenance helps users continue using your app without unnecessary problems.
Frequently Asked Questions
Can You Publish an App on Google Play Store for Free?
No. You must pay the one-time $25 Google Play developer registration fee to create a developer account. You can then publish eligible apps through that account without paying the registration fee again for every app. Other costs may apply for development, services, or monetization.
Can You Publish an Android App Without Coding?
Yes. Some no-code and low-code app builders allow you to create Android applications without writing traditional code. However, your app still needs to meet Google Play’s technical, functionality, privacy, and policy requirements before it can be published.
Can You Upload an APK Instead of an AAB File?
New Android apps submitted to Google Play must use the Android App Bundle (AAB) format. APK files are still used for Android installation and certain testing situations, but AAB is the required publishing format for new apps.
Do You Need a Website to Publish an App on Google Play?
You do not necessarily need a complete business website. However, you must provide a publicly accessible privacy policy and any additional required web resources, such as an account deletion page if your app supports account creation. Your developer contact information must also meet Google’s requirements.
Can You Publish an App Built With Flutter or AI Tools?
Yes. Apps built using Flutter, AI-assisted development tools, or supported app builders can be published on Google Play. The app must work correctly, meet Android technical requirements, and follow Google’s developer policies. The tool used to build the app does not remove these requirements.